Craft Cook Sew Decorate Image Map

Thursday, August 15, 2013

Halloween Shirt and Skirt Ideas...

I made these last year, but they still fit, yay. 
For the skirt I bought some orange satin, and some spider web black sheer material and layered them together.  I did a simple elastic band.  Then I just added purple polka dot ribbon to the bottom edge.
For the shirt I bought a plain black t-shirt and cut out the orange satin and sheer black web material into an octagon.  Then I just lined the outside edge with the polka dot material.


Minnie/Mickey Mouse Shirt Ideas For Disneyland...

I made some of these shirts last March, but needed to make a new one for Taylor's first time to the "happiest place on earth."  It is so easy to do and so cute for Disneyland.  It's best to find a shirt solid shirt you already have and some scrap material.  I turned the material to the back side and drew with a pen a mickey mouse head.  Then I cut it out and pinned it to the front.

Then I sewed it along the edge about a quarter of an inch in.

Then I made a sparkly bow and sewed it to the front and now it's a Minnie shirt.

Below is one I made earlier and I embroidered Minnie Mouse to the front also.

We went to Disneyland with my Mother-in-Law so I made her one to match us :).

Here's mine.

And here they are in action!

Here are some I made last Halloween!


Monday, August 12, 2013

How to make a crib skirt/dust ruffle tutorial...


First, I just used my old crib skirt and cut off the ruffle and left the center so I could re-use it.  Otherwise you need to borrow someones and measure the center rectangle and cut your own out.  You could use an old sheet or buy some new thin cotton sheet material.  To save me money and time I decided I was only going to do three sides because no one will ever see the side against the wall. 
Next, I measured my own crib. I measured the distance from the bottom of the  mattress to the floor to decide how long to make the skirt.  I ended up making mine about 22 inches long.  So I cut my main fabric 18 inches wide and I doubled the length of the side of the rectangle because I want it to have a gathered look.  I used four different fabrics total and added various lengths my yellow fabric below to get the total 22 inches.


Below you can see the different layers I used.   For all the layers I hemmed all the edges under before sewing them to each other. I sewed the yellow and the blue together and added the blue/green ruffle to the top of where they joined.  But before I sewed the ruffle on top I sewed the bottom fabric (the one with pink flowers on it) to the same spot underneath where the blue and yellow meet.  Does that make sense?!  I wanted them to all have the same seam line so I could cover in up in one shot with the ruffle.
Below you can see how I made the ruffle. I actually left the edges on both sides of it raw, meaning they are cut and not hemmed under or anything.  Makes it really easy that way and I like that old fashioned handmade look.  To learn how to make this ruffle  easily on your machine go HERE.

Below you can see that next I gathered the top edge of the yellow fabric and made it gathered enough to fit to the edge of the crib rectangle.  To learn how to do this go to my ruffly romper tutorial HERE and I show how to gather and pin fabric together.
Below you can see how much I gathered it to fit the rectangle edge.  Then I pinned the right sides together, also shown below, and then sewed them together. 

Next finish the two shorter sides the same way you just made the longer one.  Once you flip your fabric back over after sewing right sides together, it should look something like below.  Obviously if you want to make a simple bed skirt you can choose one fabric and just make it longer to meet you measurements.  But look how cute it is with all the extra work!


  Tomorrow-bumper tutorial.


Wednesday, August 7, 2013

How to make a crib bumper tutorial...


To start it would help A LOT if you can get your hands on a used bumper that you can take apart.  I used my old one and started cutting off the old fabric from the batting underneath.


I know you can google the measurements of how much batting to get if you want to start from scratch but this way it also already has the old folds and the right form.

Next you can either use the batting from the bumper or the old material to measure how long and wide to cut your new fabric.


I decided to just use one pattern on each side instead of the multiple like my old one.

Below I just wanted to show how I saved the ruffle from my old bumper since it matched my new fabric.

Below you can see how I have the exact measurement of fabric to cover the batting.  Always leave a 1/4 inch  extra on all sides for seam allowance.


My little helper. :)

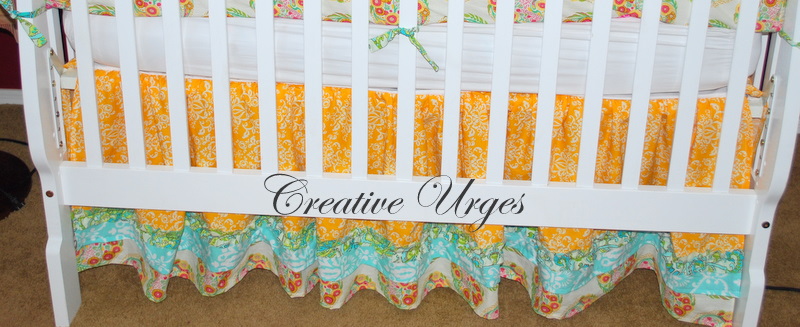
Next I attached the ruffle to my flower pattern.


Pin right sides together and sew along edge.


Then I had to make all the ties that attach to the crib.  This part was really tedious.  I measured the length of my old ties and cut out 28 strips of a different pattern.

Fold the strip in half right sides together and sew along the top edge and one side, leaving the bottom edge open to turn it right side out.

It should look like the pic below before you turn it right side out.
Next I took a fat fabric pencil, but you can find anything similar.  Make sure the tip isn't sharp so it doesn't poke a hole in the fabric.  Starting from the corner of the top edge that you sewed shut, start working the pencil into it.  Trying to wiggle it inside and pulling fabric down over it.  Once I got the hang of this it wasn't too bad.


Then you need to iron all the ties flat again once they are all turned right side in.
Next I pinned the ties two each on top and bottom where ever there was a fold line in my old bumper.  And you need to attach these to one of the side of the bumper fabric before attaching the two bumper fabrics together.  At the two ends of the bumper you will only put one tie each on top and bottom .  I'm sorry I didn't get a picture of this.  But its how you attach the two ends to each other and to the crib.  So in other words on the ends if you held them closed to each other you would only see a total of 4 ties not 8.

Next I pinned the other fabric right sides together and sewed them together.  Below is what it looks like opened up.

Then right sides together again and sew the tops together.


So now you have a long tube with ends open.  And for the fun part of turning it right side out.  I just shoved my hand in there and slowly pulled and pushed it along.

Next you have to pull the fabric over the old batting.  This was kind of hard and took some time but its possible :).


Once I got it all the way through I pinned the edges inside each other and sewed along the edge.


It's hard to see below but using three pins I pinned along the old fold of the batting and lined my ties up with this fold.

Then I sewed down this fold.  Kind of tricky shoving the bumper through your machine.

Yay, it's finally done!