


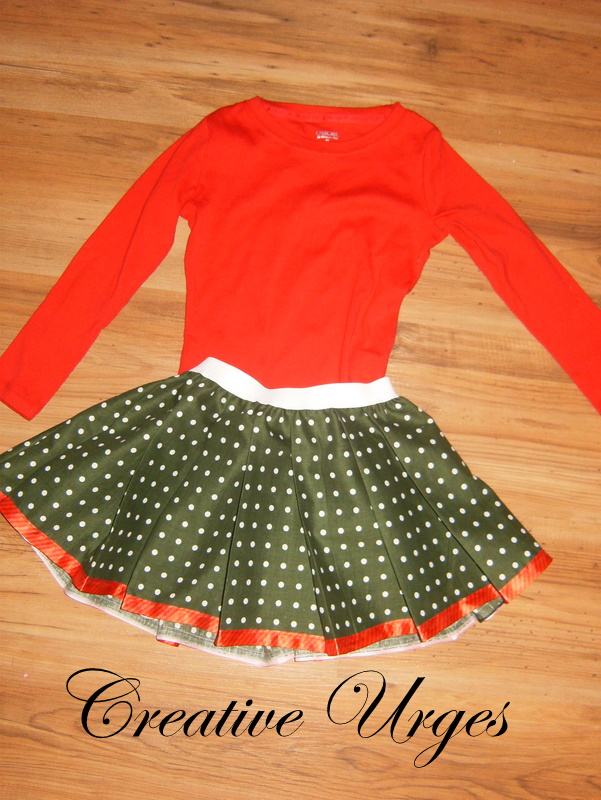
Here's my Santa's Lil' Helper :).


For my 5 year old I had a half yard width and it was 2 yards long. I matched right sides together and surged the ends at an angle, but you can zig zag the edges if you don't have a surger.

Then I decided to have a pleated finish so I started folding and pinning every 2 inches back and forth. I didn't calculate the measurements so once I got close to the end I had to fudge it a little.

Then with pins in place I sewed along the top edge.

Below is roughly what it should look like. If you want to make it alot easier you can just have a gathered skirt instead of pleats.

I also added a red ribbon to the bottom edge. Next I ironed all the pleats to make them crisp looking.


Next I pinned some 1 inch white elastic to the pleated skirt and sewed it together. For better instructions and how to attach elastic band click HERE.

You could leave it as a skirt but...
I wanted to make it into an apron dress so I cut a 12 by 15 square and adjusted the size once I held it up to Tori. I also made a pocket for the middle of it.

So for the pocket hem 3 sides close to the edge.

For the top opening edge of the pocket (which below is upside down) I hemmed the edged down 1 inch. Does this make sense?

Then I pinned it in place and sewed the pocket along the 2 sides and bottom edge to polka dot fabric. I then took big red ric rac and sewed it along the 3 sides of the polka dot fabric edges.

Then I pinned the apron square to the front of the skirt to the elastic and sewed it together.

The last thing I did was I added ribbon straps to the back and criss-crossed them.


So I really wanted to get a picture of the two of them wearing the dressed but of course my 3 yr old wouldn't have it and this is what she wanted to wear instead, hahaha.

But of course once Tori went to school she finally caved and put it on for me :).


No comments:
Post a Comment