


Fabric Roses
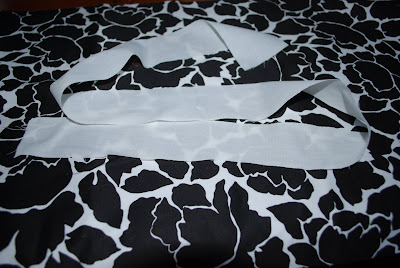 Cut a long piece of fabric about 2 inches wide.
 Grab an end and fold it in half.
 On the corner of the edge put some hot glue so you can tuck it together.
 So after you tuck that first edge, add a little more and twist it together.
 Now you can take the remaining fabric and always have it twisting ahead of time.
 Keep dabbing the glue and attaching the twisted edge to it.

 You can see how you start glueing along the edge as far as you can each time, and continue twisting and pulling it along the glued edge.
 At the very end, tuck the edge underneath the rose.
 Now I took a cute little tank for my girls and wanted to use the fabric rose to embellish it.
 To attach it I double threaded a needle and knotted the end.
 Next, I arranged the roses how I thought they looked best.
 Then I pinned them all in place.
 Starting at the back I began hand stitching the thread through the rose.
 I continued around the outer edge. From the back I made big stitches, but in the front I only made small unnoticeable ones.
 It's a good idea to push the pin into a fold so that you don't see the stitches in front.
 So when your done, the back should look similiar to this. Then make a finishing knot and cut the end off.

And you are left with an adorable handmade looking tank!
 Cut a long piece of fabric about 2 inches wide.
 Grab an end and fold it in half.
 On the corner of the edge put some hot glue so you can tuck it together.
 So after you tuck that first edge, add a little more and twist it together.
 Now you can take the remaining fabric and always have it twisting ahead of time.
 Keep dabbing the glue and attaching the twisted edge to it.
 You can see how you start glueing along the edge as far as you can each time, and continue twisting and pulling it along the glued edge.
 At the very end, tuck the edge underneath the rose.
 Now I took a cute little tank for my girls and wanted to use the fabric rose to embellish it.
 To attach it I double threaded a needle and knotted the end.
 Next, I arranged the roses how I thought they looked best.
 Then I pinned them all in place.
 Starting at the back I began hand stitching the thread through the rose.
 I continued around the outer edge. From the back I made big stitches, but in the front I only made small unnoticeable ones.
 It's a good idea to push the pin into a fold so that you don't see the stitches in front.
 So when your done, the back should look similiar to this. Then make a finishing knot and cut the end off.
And you are left with an adorable handmade looking tank!


3 comments:
SO cute! I have been meaning to make some of these, I am definitely going to have to give it a try now! Thanks for the tips
Did you put a piece of that stiff felt on the back of the roses? I haven't tried these kind before, but I have tried ones with ribbon basted down the middle and then pull the thread like you did on the orange tank and then twist it into the rose and put felt on the back for structure. I like yours. Super cute
Are you going to sell your stuff on Etsy? This blog is awesome!
Post a Comment